Vue3 + TypeScript 开发实践总结
Vue3 + TypeScript Study
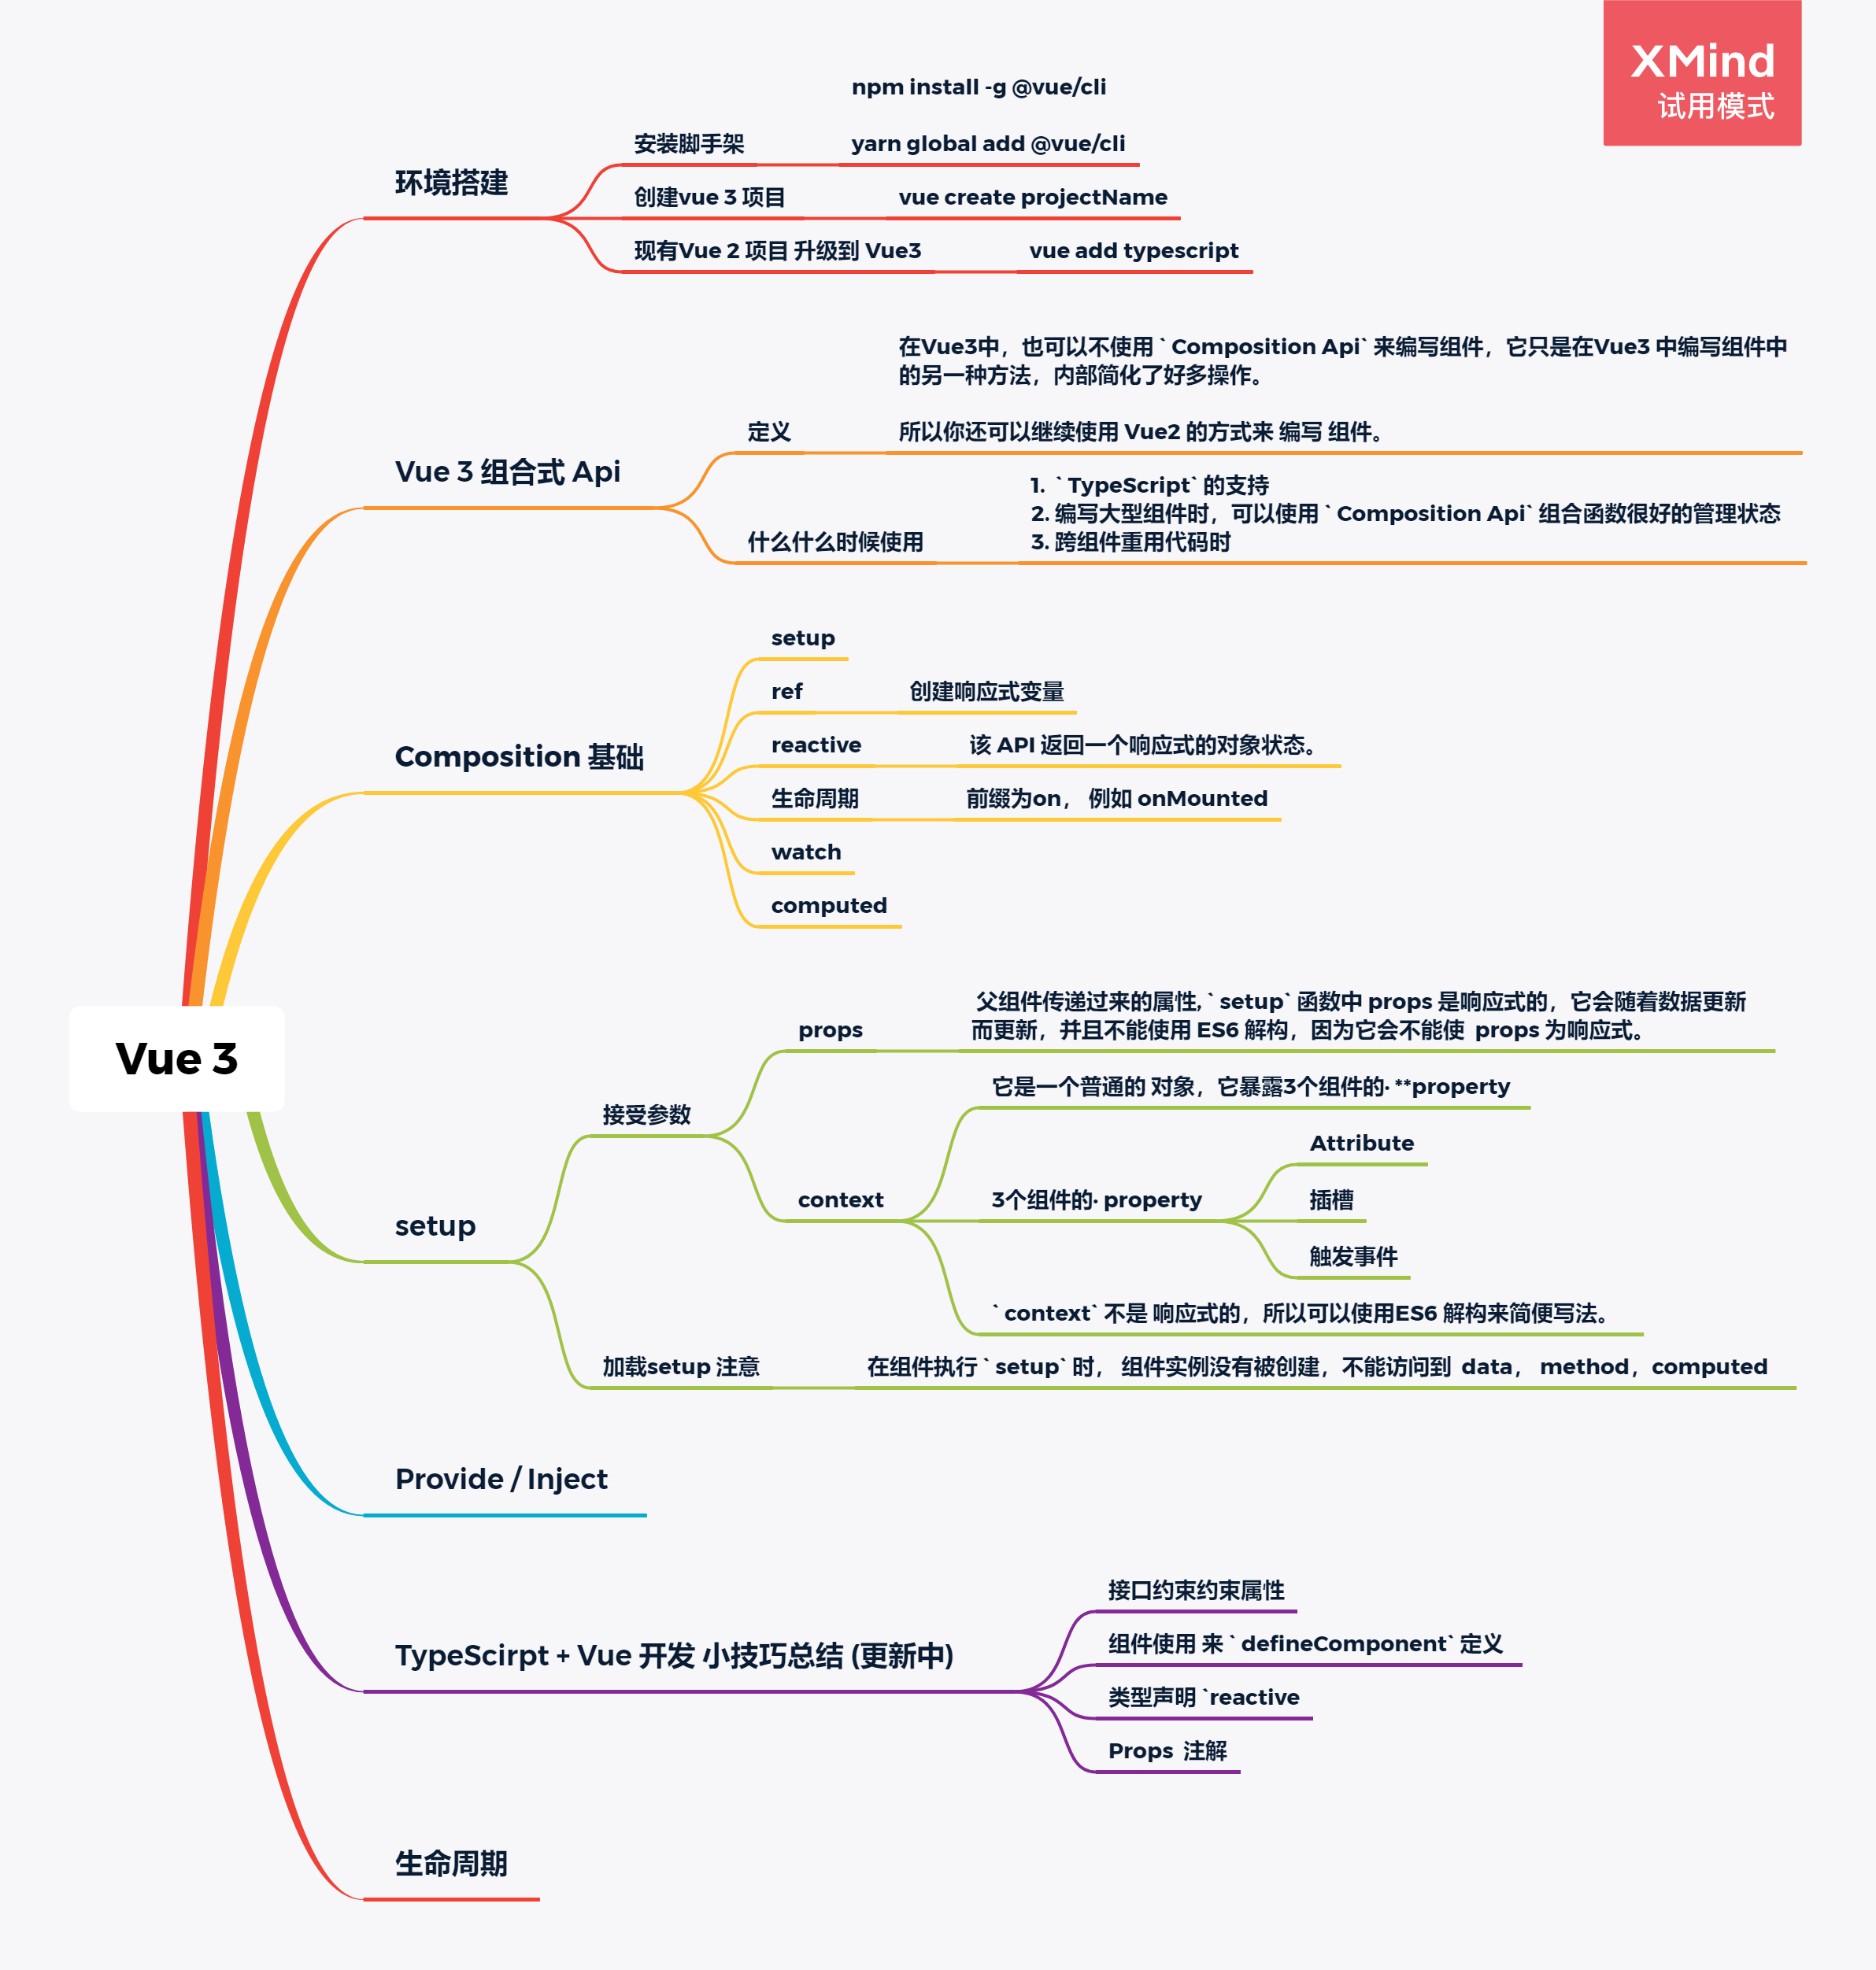
一, 环境配置
1.1 安装最新 Vue 脚手架
npm install -g @vue/cliyarn global add @vue/cli
1.2 创建Vue3 项目
vue create projectName
1.3 现有Vue 2 项目 升级到 Vue3
vue add typescript
二, 进击Vue3
2. 1 Vue 2 局限性
随着组件与组件依赖之间不断变大,组件很难读取和维护
没有完美的方法解决跨组件代码重用
2.2 Vue 3 如何解决Vue 2 局限
组件难以维护管理
【在Vue3 中 编写组合函数,使用 Compositon Api setUp 来解决】没有完美的方法解决跨组件代码重用
三,Vue3 Composition Ap i
3.1 关于 Composition Api
在Vue3中,也可以不使用 Composition Api 来编写组件,它只是在Vue3 中编写组件中的另一种方法,内部简化了好多操作。
所以你还可以继续使用 Vue2 的方式来 编写 组件。
3.2 什么时候使用Composition Api
TypeScript` 的支持
编写大型组件时,可以使用 Composition Api 组合函数很好的管理状态
跨组件重用代码时
四,Composition Api 必备基础
4.1 什么是 setup
setup 是用来配置组件状态的另一种实现。
在setup 中定义的状态,方法要想在模板中使用,必须 return
注意:
- setup 方法是在 components , props data Methods Computed Lifecycle methods 之前执行
- 同时在 setup 中是不能访问 this
4.2 ref 创建响应式变量
在 Vue2 中,我们定义一个响应式变量可以直接在 data 中 定义并且在模板中使用该变量。 如果 使用的 composition api 的话,我们得在 setup 中 使用 ref 来创建 响应式变量,并且得将它返回,才能在页面中使用。
使用
- 引入 ref import { ref } from ‘vue’
- 初始变量 const name = ref(‘指定默认值’)
- 返回变量 return { name } 在return中还可以返回方法
- 在 setup 中 访问 定义的变量值,不能直接通过变量名来获取, 必须通过 变量名.value 来获取到该对象 、 值
这样的好处
- 状态好管理,可以划分好几个 setup 状态管理,最后在一个 文件导入所有,并且使用。
<template><div><h1>{{title}}</h1></div></template><script>import {ref,defineComponent} from 'vue'export default defineComponent({setup () {// 定义响应式变量const title = ref('前端自学社区')// 访问该变量console.log(title.value)// 返回变量return {title}}})</script>
4.3 生命周期
Composition Api 生命周期钩子 和 Vue 2 选项式 生命周期钩子名称一样,只是在使用 组合式API时,前缀为 on, onMounted`
sd
下面代码中有两个 mounted 生命钩子,你猜哪个会先执行?
setup 会先执行
setup () {// 定义响应式变量const title = ref('前端自学社区')console.log(title)// 返回变量function getTitle(){console.log(title.value)}// 页面在加载onMounted(getTitle)return {title}},mounted() {console.log('测试 mounted 执行顺序')},
4.4 watch
在 setup 中使用 watch响应式更改
引入 watch, import { watch } from ‘vue’
直接使用watch,watch 接受 3 个参数
- 要监听更新的 响应式引用或者 getter 函数
- 一个回调用来做更新后的操作
- 可选配置项
import {wathc} from 'vue'// 定义响应式变量const num = ref(0)// 更新响应式变量function changeNum(){num.value++}// wathc 监听响应式变量watch(num,(newValue, oldValue) => {console.log(`newValue为:${newValue},--------oldValue为:${oldValue}`)})
4.5 computed
它也是 从 vue 导入,computed 函数返回一个作为 computed 的第一个参数传递的 getter 类回调的输出的一个只读的响应式引用。为了访问新创建的计算变量的 value,我们需要像使用 ref 一样使用 .value property。
- 当num值变化时,nums 的值会 *3
import {ref,computed} from 'vue';const num = ref(0)//更新numfunction changeNum(){num.value++}//监听num变化const nums = computed(() =>{return num.value * 3})
五,setup
5.1 接受两个参数
props: 父组件传递过来的属性, setup 函数中 props 是响应式的,它会随着数据更新而更新,并且不能使用 ES6 解构,因为它会不能使 props 为响应式。
context : 它是一个普通的 对象,它暴露3个组件的· property
- Attribute
- 插槽
- 触发事件
context 不是 响应式的,所以可以使用ES6 解构来简便写法。
props:{obj:{type:Object}},setup (props,{attrs,slots,emit}) {console.log(attrs)console.log(slots)console.log(emit)console.log(props.obj)}
5.2 组件加载 setup 时注意
在组件执行 setup 时, 组件实例没有被创建,因此就无法访问以下属性
| 选项式 API | Hook inside setup |
|---|---|
| beforeCreate | |
| created | |
| beforeMount | onBeforeMount |
| mounted | onMounted |
| beforeUpdate | onBeforeUpdate |
| updated | onUpdated |
| beforeUnmount | onBeforeUnmount |
| unmounted | onUnmounted |
| errorCaptured | onErrorCaptured |
| renderTracked | onRenderTracked |
| renderTriggeredonRenderTriggered | onRenderTriggered |
七, 跨组件之间传值
在 Vue 2 中,我们可以使用 Provide/Inject 跨组件传值,在 Vue 3 中也可以。
在 setup 中 使用,必须从 vue 中导入使用。
使用 Provide 时,一般设置为 响应式更新的,这样的话,父组件变更,子组件,子孙组件也跟着更新。
怎么设置为响应式更新呢?
- 使用 ref / reactive 创建响应式变量
- 使用 provide(‘name’, ‘要传递的响应式变量’)
- 最后添加一个更新 响应式变量的事件,这样响应式变量更新, provide 中的变量也跟着更新。
父组件
import { provide, defineComponent, ref, reactive } from "vue";<template><Son/></template><script>import { provide, defineComponent, ref, reactive } from "vue";export default defineComponent({setup() {const father = ref("我父组件");const info = reactive({id: 23,message: "前端自学社区",});function changeProvide(){info.message = '测试'}provide('father',father)provide('info',info)return {changeProvide};}})</script>
子组件
<template><div><h1>{{info.message}}</h1><h1>{{fatherData}}</h1></div></template><script>import {provide, defineComponent,ref,reactive, inject} from 'vue'export default defineComponent({setup () {const fatherData = inject('father')const info = inject('info')return {fatherData,info}}})</script>
八, 在Vue 中 使用 TypeScirpt 技巧
8.1 接口约束约束属性
采用 TypeScirpt 的特性, 类型断言 + 接口 完美的对 属性进行了 约束
interface
//分页查询 字段属性类型验证export default interface queryType{page: Number,size: Number,name: String,age: Number}
组件中使用
import queryType from '../interface/Home'data() {return {query:{page:0,size:10,name:'测试',age: 2} as queryType}},
8.2 组件使用 来 defineComponent 定义
这样 TypeScript 正确推断 Vue 组件选项中的类型
import { defineComponent } from 'vue'export default defineComponent({setup(){return{ }}})
8.3 类型声明 reactive
export default interface Product {name:String,price:Number,address:String}import Product from '@/interface/Product'import {reactive} from 'vue'const product = reactive({name:'xiaomi 11',price:5999,address:'北京'}) as Productreturn {fatherData,info,product}
转载请注明作者和出处,并添加本页链接。
原文链接:
//www.v2ci.com/41.html